Access & Setup
Requesting Webhook Access
Webhook access isn't turned on by default — it's enabled per account on request. To get started, contact devops@celitech.com or your CELITECH account manager and ask to have webhooks enabled for your account.
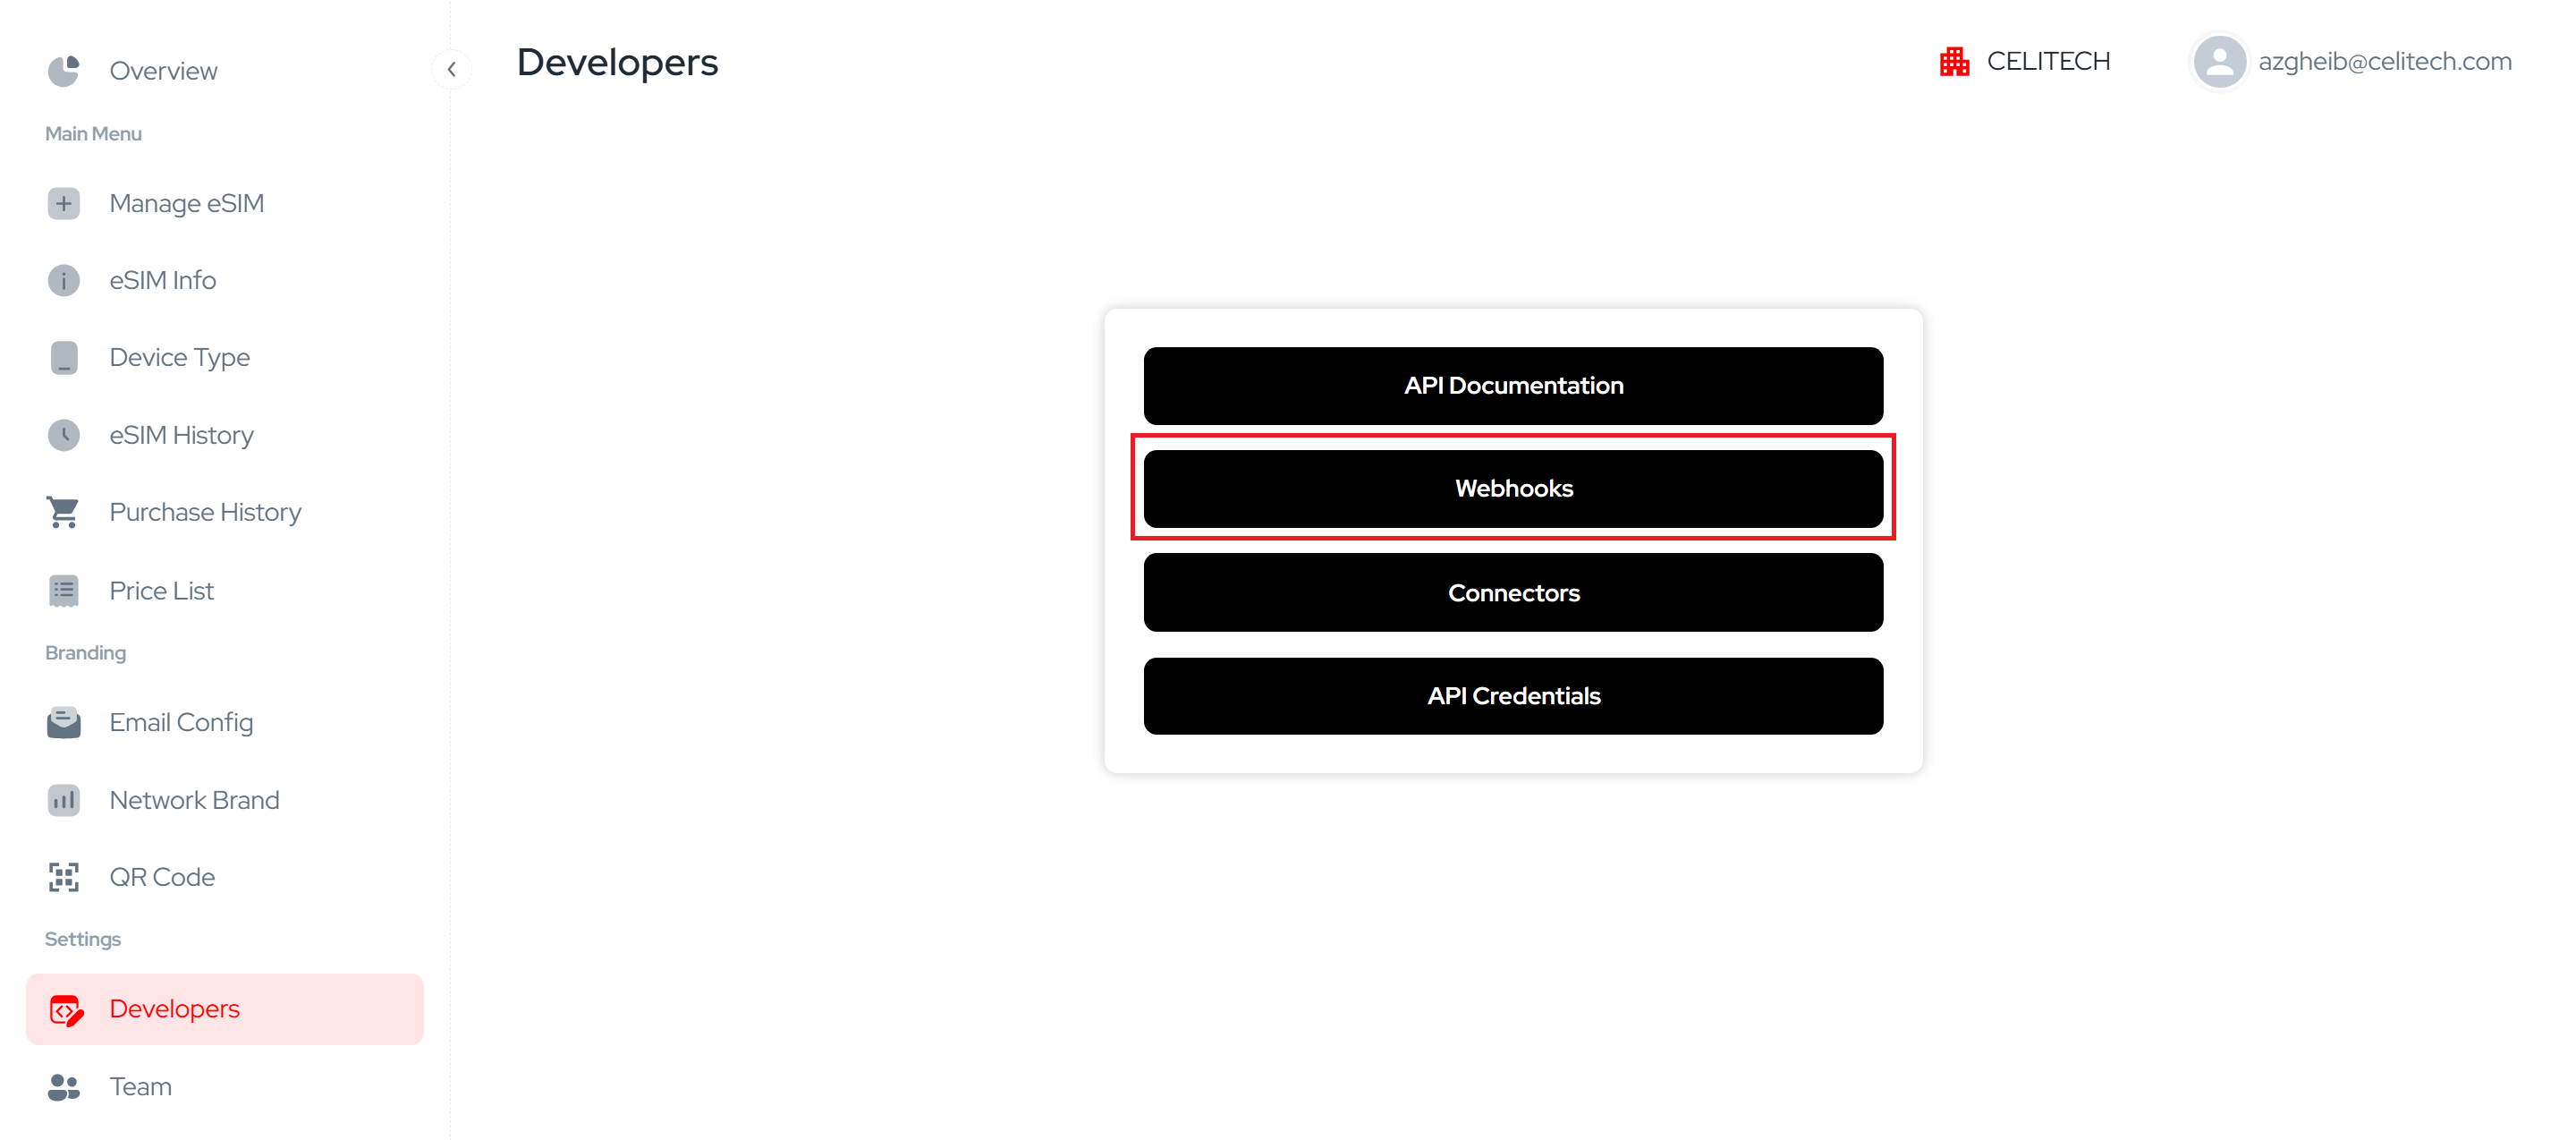
If you navigate to Developers → Webhooks in the CELITECH Dashboard before access has been enabled, you'll see: "Webhooks are not enabled for your account. Please contact devops@celitech.com to enable Webhooks for your account."
Once enabled, the Webhooks section becomes available under Developers in the dashboard, where you can register and manage your endpoint.
Registering Your Endpoint
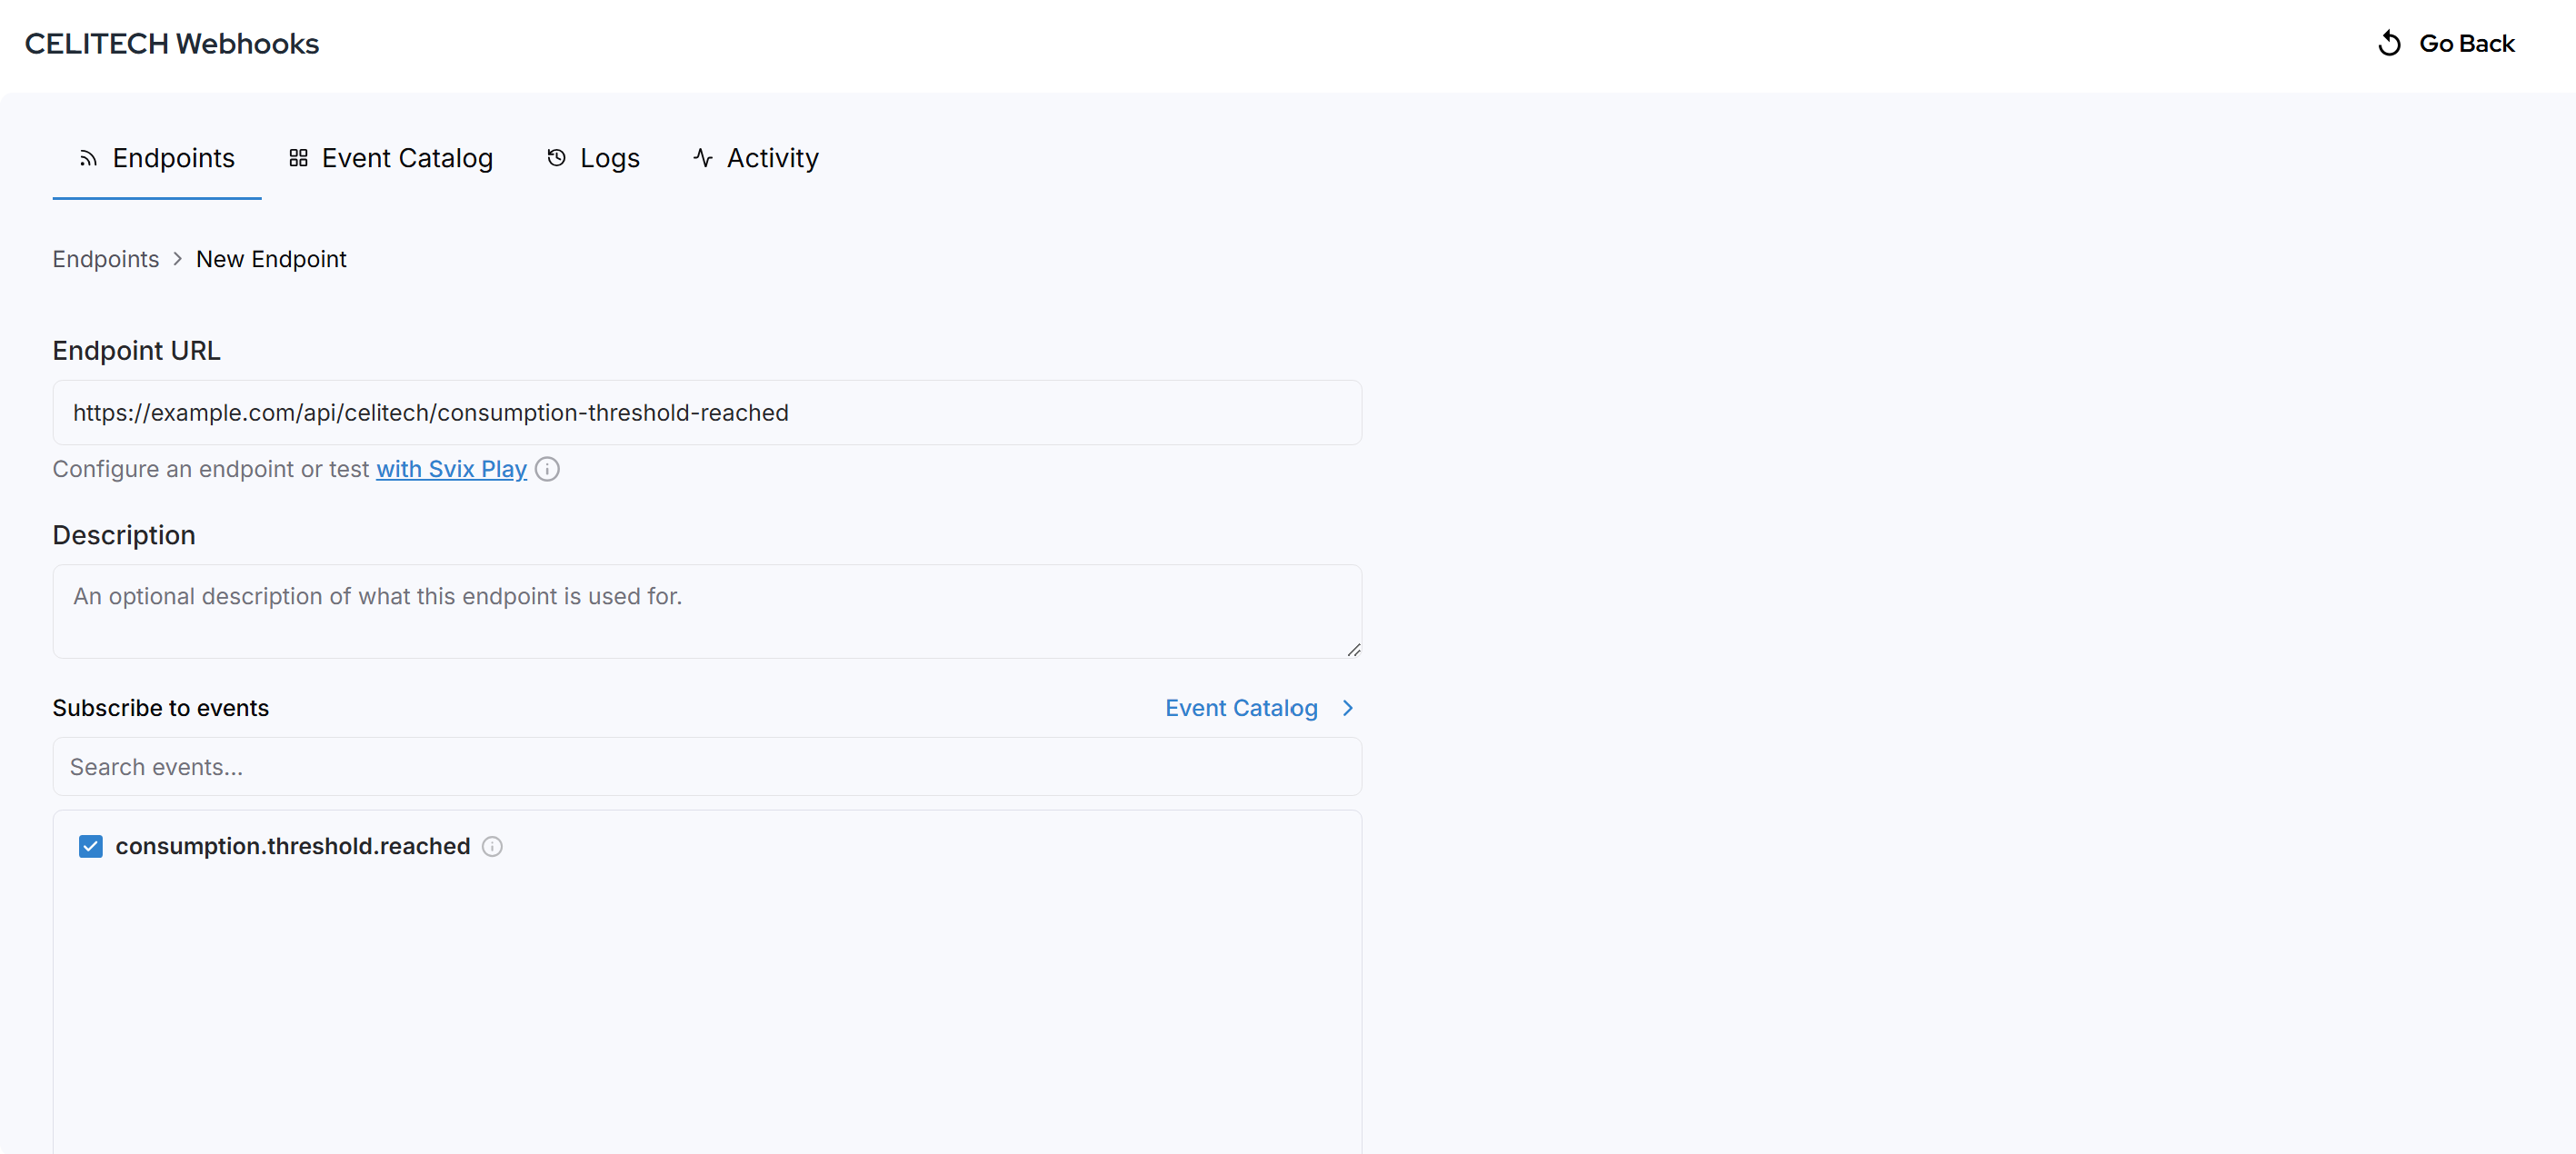
From Developers → Webhooks, add a new endpoint and fill in:
- Endpoint URL — the URL you want CELITECH to send events to.
- Description (optional) — a note to help you identify this endpoint later.
- Subscribe to events — check which event type(s) you want to receive. See the Event Catalog for what's available.
Your endpoint URL should:
- Be a public HTTPS URL. CELITECH cannot deliver to endpoints on
localhostor behind a firewall/VPN. - Respond quickly with a 2xx status code — within about 15 seconds. Do the minimal work needed to accept the request (e.g. verify the signature and enqueue it for processing) before responding — see Delivery & Retries for what happens if you don't.
Managing Your Endpoints
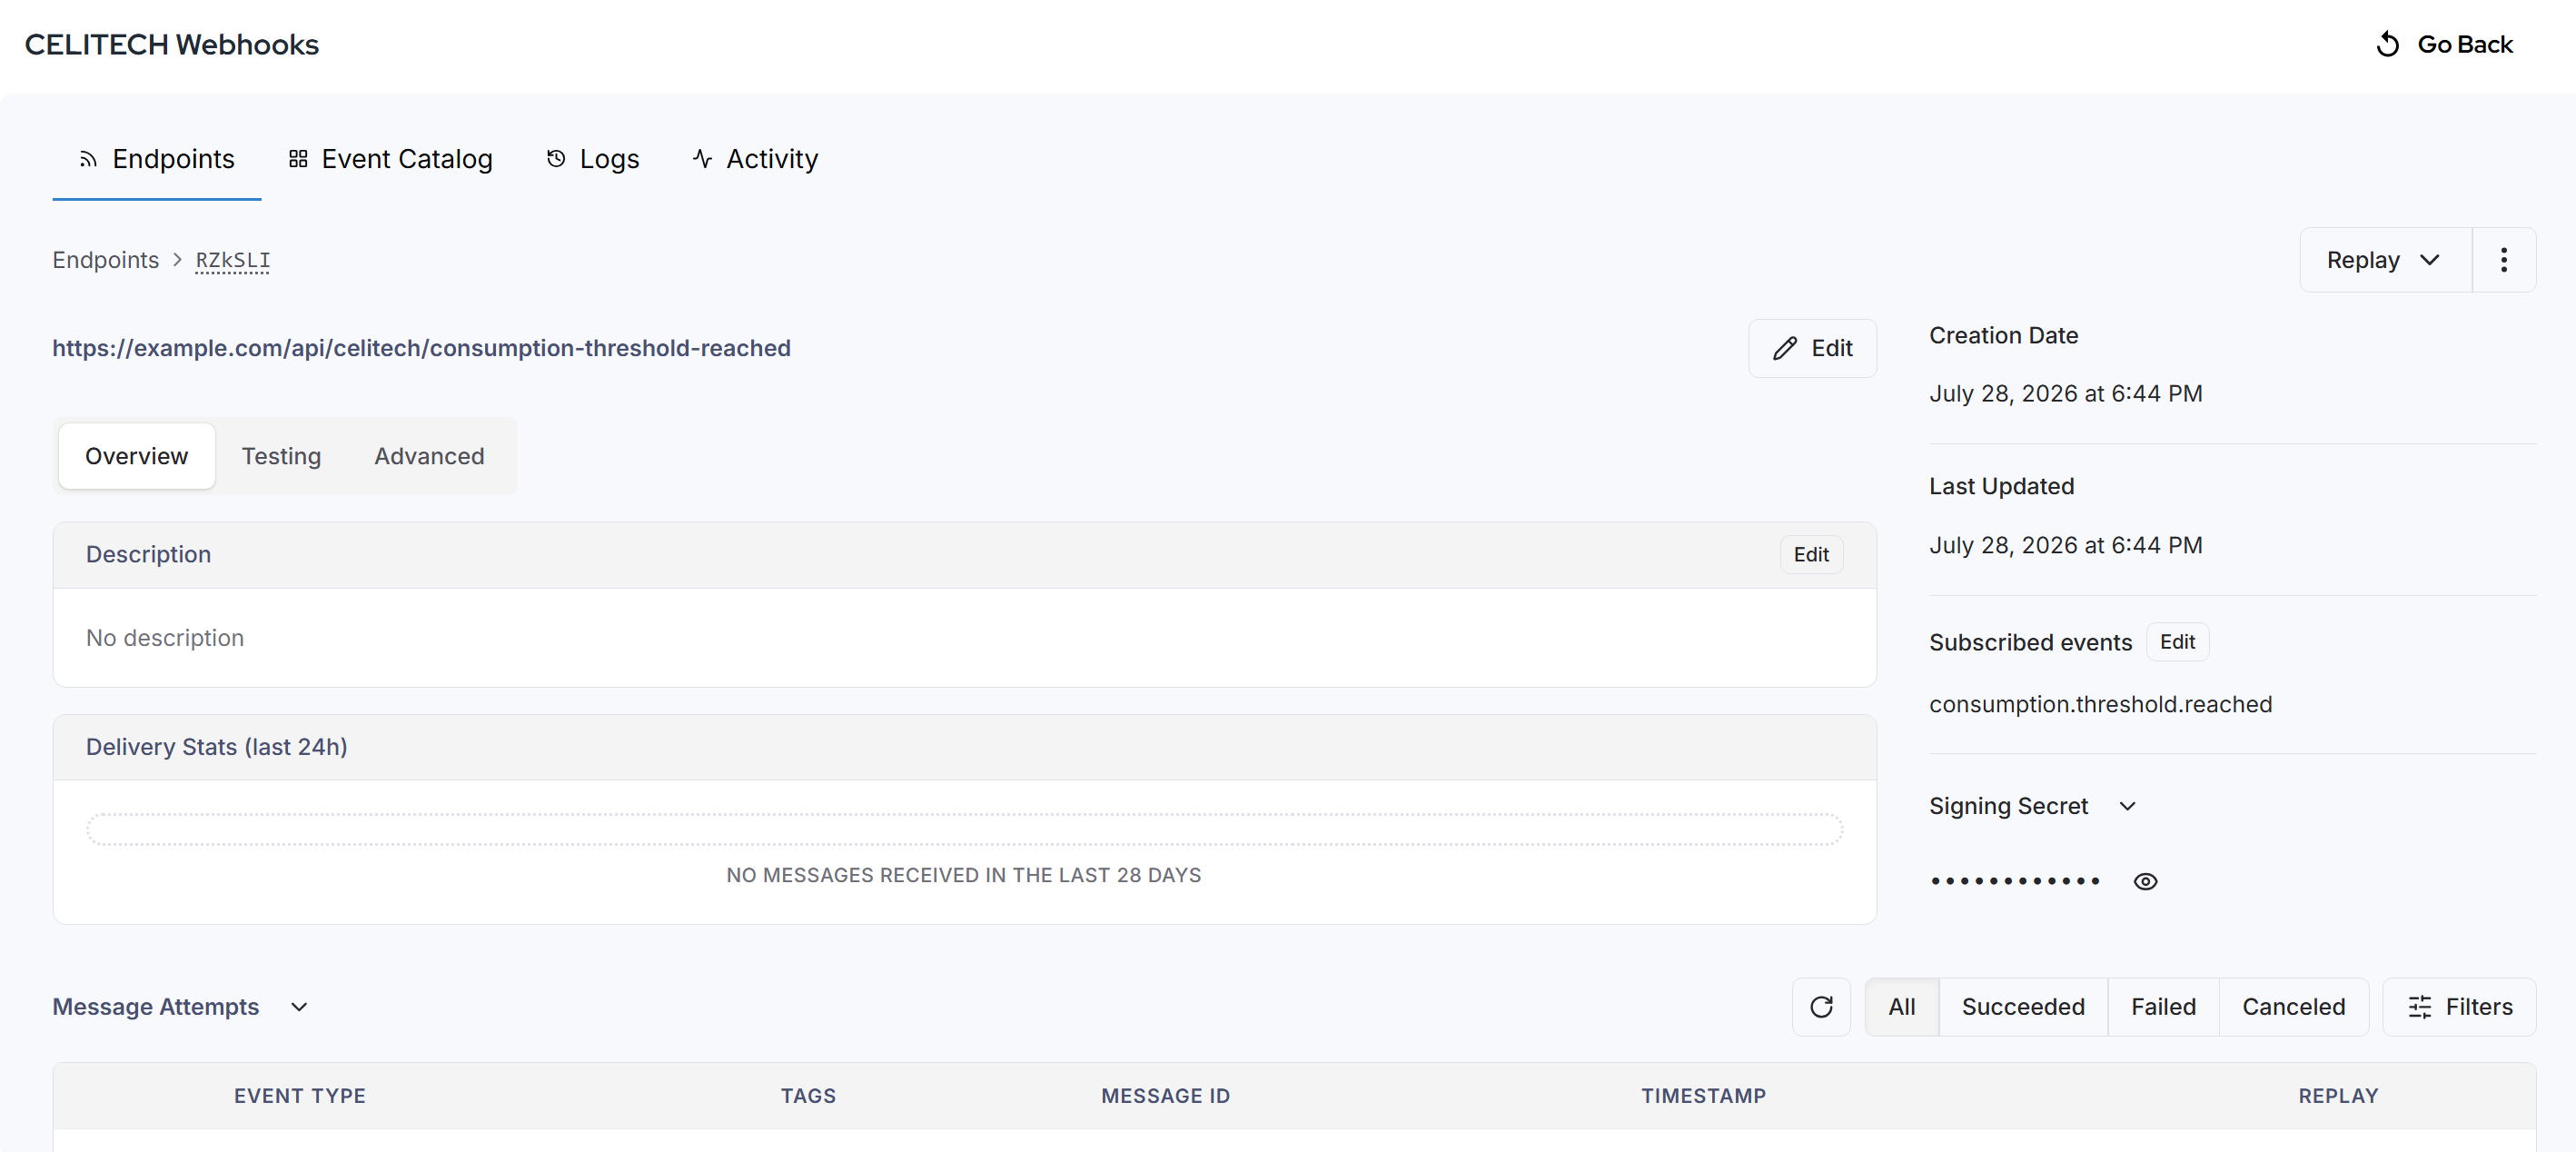
The Webhooks section of the dashboard lets you:
- View and edit your registered endpoint URL
- View and change which event(s) you're subscribed to
- Access your signing secret, used to verify webhook signatures
- View a log of recent deliveries and their status
- Send an example event to your endpoint to test your integration before relying on it in production — see Testing Your Integration
Treat your signing secret like any other credential — keep it out of client-side code and version control.